

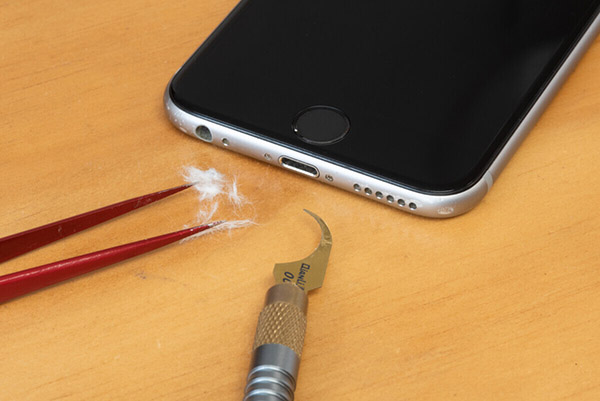
To clean an iPhone charging port safely:
- Power off the iPhone completely before touching the port.
- Inspect the port with a flashlight, then gently loosen debris with a soft dry brush or a short burst of compressed air held at a distance.
- Power the iPhone back on and test with a known-good cable.
Most charging complaints we see on the bench in Ocala turn out to be debris, not a failed part. In practice, learning how to clean an iPhone charging port properly solves the issue more often than properly solves the issue more often than people expect — a careful, gentle cleaning is usually all it takes. If a gentle clean doesn’t restore charging, the port itself — or the cable — is more likely the cause, and that’s where a proper diagnostic comes in, which we’ll cover further down.
Cleaning an iPhone charging port safely means powering the device off first, removing debris with a soft dry brush or a short, careful burst of compressed air, then testing the charge. Metal tools and liquids should stay out of the port entirely.
Why Your iPhone Charging Port Gets Dirty
An iPhone spends most of its day in a pocket, bag, or on a desk, and the charging port sits open to all of it. Every time the phone is pulled out or set down, small amounts of lint, dust, and fabric fibers work their way into the opening.
In Ocala and the rest of Central Florida, this happens a little faster than in drier regions. Humidity makes dust and lint stick together instead of falling out on their own, and sand from beach trips or lake days is abrasive enough to wedge into the port’s tight spacing.
Common causes of buildup include:
- Pocket lint from jeans, shorts, or jacket linings
- Purse or backpack debris settling into the port opening
- Sand or dirt from outdoor activity
- Dust accumulating on a desk or nightstand charging station
One mistake people often make is assuming the port only needs attention once charging has already failed. In practice, a port that looks clean from the outside can still have compacted debris further inside, out of view without a flashlight.
Signs Your Charging Port Needs Cleaning
A dirty charging port usually shows itself through the cable connection, not the phone’s software. These are the most common symptoms:
- The cable feels loose or doesn’t click into place
- Charging is slow or stops and starts on its own
- The phone only charges when the cable is angled a specific way
- The phone shows no response at all when a cable is plugged in
- A different, known-good cable produces the same problem
If more than one of these applies, the port is a reasonable first place to check before assuming the battery, cable, or adapter is at fault.
The clearest signs of a dirty iPhone charging port are a loose-fitting cable, charging that only works at a specific angle, and charging that starts and stops without a clear cause.
Lightning vs. USB-C — Does Your iPhone Model Matter?
Yes, and this is one of the most overlooked details in most cleaning guides. Older iPhones use a Lightning port, while iPhone 15, 16, and 17 models use USB-C. The pin layout is different, and that changes how much room there is for error.
| Port Type | iPhone Models | Cleaning Notes |
| Lightning | iPhone 14 and earlier | Wider pin spacing, slightly more tolerant of a soft brush or gentle toothpick |
| USB-C | iPhone 15, 16, 17 | Denser pin layout, less clearance — gentler tools and shorter air bursts are safer |
The practical difference is margin for error. A USB-C port has less room between contacts, so a stiff brush or a firm toothpick jab is more likely to bend something than it would be on an older Lightning port. If the iPhone is a 15, 16, or 17, it’s worth being extra deliberate rather than repeating the same motion used on an older device out of habit.
iPhone 15, 16, and 17 models use USB-C ports with a denser pin layout than the older Lightning port, which means gentler tools and shorter compressed-air bursts are the safer approach.
Tools You’ll Need — Safe vs. Unsafe
Not every commonly recommended tool is actually safe for this job. Here’s a direct breakdown.
| Tool | Safe / Unsafe | Why |
| Soft, dry brush (anti-static or electronics brush) | Safe | Loosens debris without scratching contacts |
| Wooden or plastic toothpick | Safe, used gently | Non-conductive, won’t short the port if handled carefully |
| Compressed air, short burst, held at a distance | Use with caution | Effective for loose debris, but Apple’s own guidance advises against it — covered in detail below |
| Flashlight | Safe | Needed to see what’s actually in the port before touching it |
| Isopropyl alcohol on a lint-free swab, outer edges only | Safe in small amounts | Can help with sticky residue, but should never enter the port itself |
| Metal pins, paperclips, SIM tools | Unsafe | Conductive — risk of shorting the port or bending contacts |
| Cotton swabs | Unsafe | Loose cotton fibers can snag on pins and get left behind |
| Any liquid poured or sprayed into the port | Unsafe | Moisture inside the port risks corrosion and can trigger a Liquid Detected warning |
This is also where a common source of confusion comes from. Several charger and accessory brands list compressed air as a standard tool in their step-by-step instructions, then separately warn against it in their safety notes — without resolving which one applies. That contradiction is addressed directly in the next section.
The safest tools for cleaning an iPhone charging port are a soft dry brush, a wooden or plastic toothpick used gently, and a flashlight for inspection. Metal tools, cotton swabs, and liquids poured directly into the port are unsafe.
Step-by-Step: How to Clean the Port
- Power off the iPhone. This removes any risk of a short circuit while a tool or air is near the contacts.
- Inspect with a flashlight. Look for visible lint, sand, or a dark buildup at the back of the port before deciding how much cleaning is needed.
- Brush gently. Use a soft, dry brush in small circular motions to loosen debris near the opening. Avoid pressing the bristles deep into the port.
- Use air carefully, if at all. If choosing to use compressed air, hold the can upright, keep the nozzle a few inches away, and use short bursts rather than a sustained stream.
- Remove stubborn debris with a toothpick. Insert a wooden or plastic toothpick gently along the edges of the port, without forcing it toward the center where the contacts sit.
- Test the charge. Plug in a known-good cable and check whether the connection feels solid and charging starts normally.
This usually breaks when someone skips the inspection step and goes straight for a toothpick. Without seeing what’s actually inside, it’s easy to push debris deeper instead of pulling it out — a mistake that turns a simple clean into a longer repair conversation.
To clean an iPhone charging port, power the device off, inspect it with a flashlight, gently brush the opening, use short bursts of air if needed, remove stuck debris with a toothpick along the edges, then test with a known-good cable.
What Apple Actually Recommends (Clearing Up the Compressed Air Confusion)
This is where a lot of guides contradict themselves, sometimes in the same article. According to Apple’s support documentation, compressed air, aerosol sprays, and any liquid cleaners are not recommended for cleaning an iPhone’s ports. Apple instead advises using a soft, dry, lint-free cloth on the exterior and avoiding inserting anything into the ports where possible.
The reasoning is straightforward: a strong burst of air can push debris further into the port instead of out of it, and in some cases can affect the pressure-sensitive components near the speaker and microphone openings. This is different from the advice several accessory brands give, which often lists compressed air as step one without noting Apple’s position at all.
In practice, a short, controlled burst from a distance carries less risk than a sustained spray directly into the opening — but Apple’s official stance is the more conservative approach, and it’s worth knowing that going in. If the goal is to stay as close to manufacturer guidance as possible, a soft brush and a gentle toothpick are the lower-risk starting point, with compressed air treated as an optional last step rather than the default.
The “Liquid Detected” Warning — What It Means for Cleaning
“Liquid Detected” warning: An alert iOS displays when built-in sensors detect moisture inside the Lightning or USB-C port, designed to stop charging until the port has fully dried and reduce the risk of corrosion.
This warning can appear even without an obvious spill. Humidity, condensation after moving between an air-conditioned space and Florida’s outdoor heat, or a small amount of residual isopropyl alcohol from a previous cleaning attempt can all trigger it.
If this warning appears, the port should not be charged or cleaned further until it’s fully dry. Placing the phone in a dry, well-ventilated area for a few hours, port facing down, is typically enough. Attempting to force a charge or insert a tool while the warning is active raises the risk of corrosion on the internal contacts.
Mistakes That Turn a Simple Clean Into a Costly Repair
| Mistake | What It Risks | Safer Fix |
| Using a metal pin or paperclip | Bent or shorted contacts | Wooden or plastic toothpick instead |
| Blowing into the port with your mouth | Moisture and saliva causing corrosion | Soft brush or short compressed-air burst held away from the port |
| Pouring or spraying liquid into the port | Internal corrosion, possible Liquid Detected warning | Isopropyl alcohol applied only to a swab, used on outer edges |
| Forcing a toothpick toward the center pins | Bent or scratched contacts | Gentle motion along the port’s edges only |
| Repeating aggressive cleaning attempts without a flashlight check | Debris pushed deeper each time | Inspect first, then decide whether more cleaning is actually needed |
A common issue is treating a stuck cable as a reason to push harder rather than stop and inspect. If a cable won’t seat properly after one or two gentle cleaning attempts, that’s a signal to stop, not a signal to try a firmer tool.
Still Not Charging After Cleaning? Here’s What That Means
If a careful cleaning attempt doesn’t restore normal charging, the cause is usually one of three things:
- The cable or adapter is the actual problem, not the port. Testing with a different known-good cable rules this out quickly.
- The port has physical damage — bent pins, a cracked housing, or corrosion from earlier liquid exposure — that cleaning alone can’t fix.
- The charging port assembly itself needs replacement, which is a component-level repair rather than a cleaning job.
At this point, repeated attempts with more force or a different homemade tool tend to make the underlying issue worse rather than better. A proper diagnostic — checking the port under magnification and testing the charging circuit directly — is the more reliable next step.
If cleaning doesn’t restore charging, the next step is a professional diagnostic rather than repeated DIY attempts, since the cause is usually a damaged cable, a physically damaged port, or a charging assembly that needs replacement.
FAQs
Can cleaning my charging port fix slow charging?
In most cases, yes — slow or intermittent charging is often caused by debris interrupting contact between the cable and the port’s pins. If cleaning doesn’t change anything, the cable, adapter, or an internal hardware issue is more likely the cause.
Is it safe to use a toothpick in my iPhone charging port?
A wooden or plastic toothpick is generally safe when used gently along the port’s edges, without forcing it toward the center pins. Metal tools should be avoided entirely, since they carry a risk of shorting the port.
Why does Apple warn against compressed air?
Apple’s official guidance advises against compressed air because a strong burst can push debris further into the port instead of clearing it out, rather than removing it cleanly. A soft brush and gentle toothpick are closer to Apple’s recommended approach.
How often should I clean my iPhone charging port?
There’s no fixed schedule — cleaning is typically needed when symptoms like a loose cable or slow charging appear. In humid or dusty environments, including much of Florida, checking the port every few weeks with a flashlight is a reasonable habit.
What if my iPhone shows “Liquid Detected” but I haven’t gotten it wet?
This can happen from humidity, condensation, or residual moisture from a recent cleaning attempt, not just a direct spill. The port should be left to dry fully in a ventilated space before charging or cleaning again.
How much does professional charging port cleaning cost?
Pricing varies by device and the extent of the issue; Phone Fashion Fix offers a free diagnostic in Ocala before quoting any repair, so the cost is confirmed before work begins.
Does the iPhone 15/16/17 charging port need different cleaning care than older models?
Yes — the USB-C port on these models has a denser pin layout than the older Lightning port, so gentler tools and shorter air bursts reduce the risk of bending a contact.
Takeaways
- Most iPhone charging problems trace back to debris, not a failed part, and a careful cleaning resolves them without any repair needed.
- Metal tools, liquids poured directly into the port, and forceful compressed air all carry more risk than benefit — a soft brush and gentle toothpick handle most cases.
- If cleaning doesn’t restore charging, that’s a signal for a professional diagnostic rather than a stronger DIY attempt.
If the port still isn’t charging normally after a careful cleaning, Phone Fashion Fix in Ocala offers a free diagnostic to identify whether it’s the cable, the port, or something deeper — before any repair is recommended.
Suggest Reads might be helpful for you